You are currently not logged in. Logon or register to access more features. Vision-Riders.com is a FREE service provided by Victory Riders Network.
|
|
|
|
Visionary
Posts: 1229
Rancho Cucamonga, CA | ADDING FRONT TURN SIGNAL LEDs and LOAD EQUALIZERS
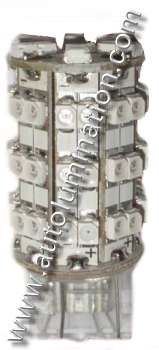
Replacing stock front 3157 bulbs with LEDs.
Difficulty Level : 1
Cost : $100 - $160
Time : 30-45 min
Items needed:
4 - LED bulbs; Amber if you have amber lenses. White, amber or switchbacks(white that blink amber) if you have clear lenses. Do not exceed 55mm tall unless you want to remove the speaker box in order to install the inner bulbs!
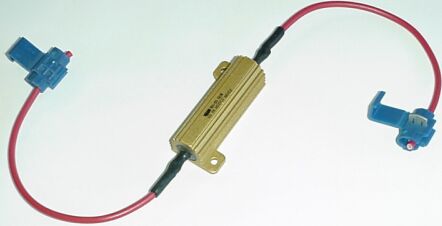
2 - Heat sinked 6 ohm resistors with a minimum of a 50 watt heat sink (aka load equalizers). These usually come with wire attached and connectors, otherwise you will need 4 wire taps as well.
1 - roll 3M doublestick insulated tape
1 pair pliers
Procedure: Start with bike OFF and windshield UP.
1. Remove front fairing access panel.
2. Remove fuse box covers.
3. Remove four- 4mm hex bolt on dash panel below windshield (where fuse panel covers are). This is done to give your hands room to move around and get to the inner bulb.
4. Remove four 6mm hex bolt attaching turn signal lens to headlamp and to outer fairing (one on each side of each lens). This is done to allow you to move the lens a little and get the bigger LED bulbs into the inner hole.
5. Remove all four stock bulbs cradles by twisting them out of the lens housing. The left side will twist up and the right side will twist down (directions given from riders position, not from front of bike).
6. Remove bulbs from cradle.
7. With cradles exposed, attach load equalizer to the two outermost wires of the outer cradles using supplied wire taps (ground and turn circuit. Leave the pink wire alone). The direction of the load equalizer is not important.
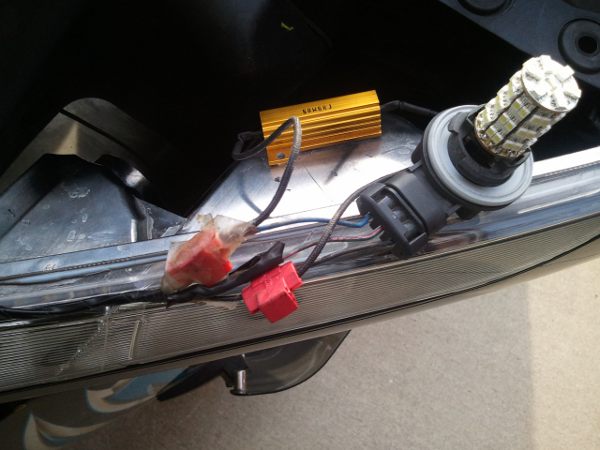
8. Use doublestick tape to secure load equalizer to top of inner lens (as shown in above picture).
9. Insert new LEDs into cradle. They are directional, so you will have to test that they are in right-side-up by turning on the power and watching for them to light up.
10. Re-install cradle with lights into lenses by reversing above removal procedure.
11. Replace all bolts and panels removed.
12. Post pictures/video of a job well done on Vision-Riders.com
|
|
| |
Jump to page : 1
Now viewing page 1 [25 messages per page] | |
|
| Copyright © 2007-2026 Victory Riders Network™
|
|


 ADDING FRONT TURN SIGNAL LEDs and LOAD EQUALIZERS

