

| You are currently not logged in. Logon or register to access more features. Vision-Riders.com is a FREE service provided by Victory Riders Network. | |
|
| |
 New Brake and Turn Lights New Brake and Turn LightsJump to page : 1 2 Now viewing page 1 [25 messages per page] | View previous thread :: View next thread |
| Discussion -> Vision Discussion | Message format |
| TimS |
| ||
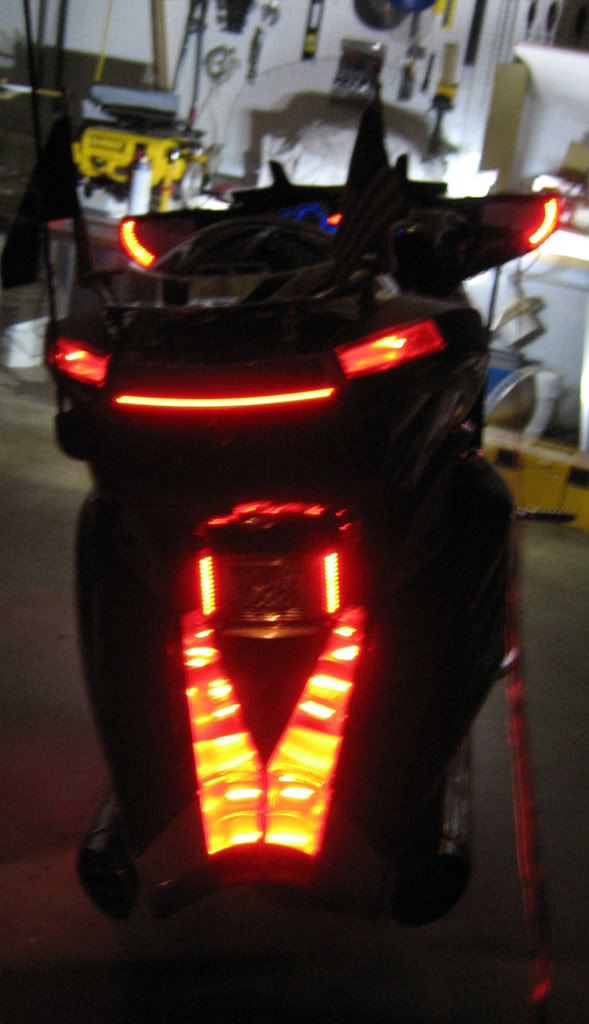
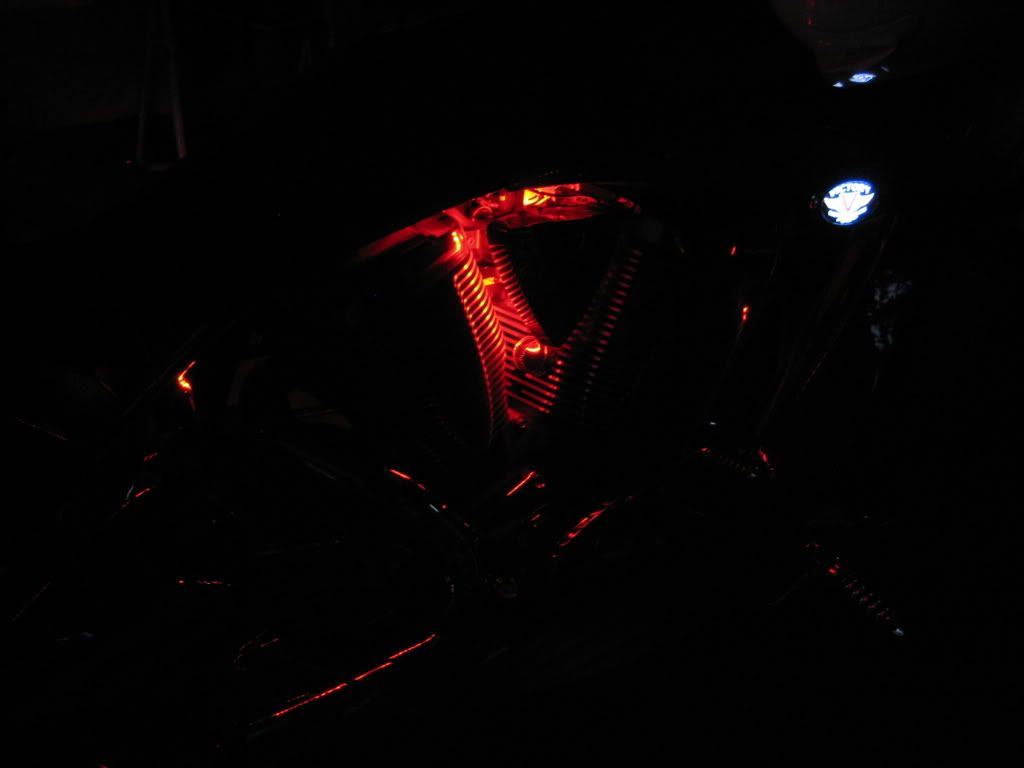
Iron Butt Posts: 810 | Here is a pict of my new brake and turn lights. Unfortunately, the camera doesn't like taking night pictures (more likely I don't know how to use the camera). There are turn and brake lights in the rear view mirrors and the license plate. There is a brake light in the crack of the trunk lid. The picture does not do them justice. They really stand out when the brakes or turn signals are applied. Hopefully, I will not get rear-ended at a stop light again with these.
Edited by TimS 2008-08-01 3:46 AM | ||
| |||
| ruttrow |
| ||
Cruiser Posts: 106 Illinois | Nicely done. | ||
| |||
| Arkainzeye |
| ||
Visionary Posts: 3773 Pittsburgh, PA | Thats looks really nice... How much work was involved? | ||
| |||
| varyder |
| ||
Visionary Posts: 8144 New Bohemia, VA | Okay Tim, enough with the taunting. Give us details, step by step instructions and so on. The pictures, well gives us the picture what it does and looks like. I want to do my mirrors with the lights for turn and brake but don't know what to use or where to start. Thanks! | ||
| |||
| a99miata |
| ||
Tourer Posts: 423 northwest florida | excellent!!!!! | ||
| |||
| radioteacher |
| ||
Visionary Posts: 3006 San Antonio, TX | This is the way the Vision should have left the factory! | ||
| |||
| DesertJim |
| ||
Tourer Posts: 496 Scottsdale AZ | Tim - Looks awesome! - - I've been waiting for you to complete this, and now you have - I WANT SOME!!!! How? where? I know you are an engineer wizard, can us regular guys do this? wiring? etc. | ||
| |||
| TimS |
| ||
Iron Butt Posts: 810 | Here is some more information. Hope this gives you some ideas. DISCLAIMER: This has NOT been DOT approved, use at your own risk. Sincerely, Tim Work In Progress: The trunk lights are still a work in progress. I still have to change the running lights into turn signals. I have the left/right turn wires routed, but need to modify the housings for turn signals. The center trunk brake-only light could also be a running light, but I wanted to emphasize the brake light. The trunk light was mounted to the trunk lid and was spaced backwards just enough to be flush with the chrome piece. The more this light is recessed inwards, the more its peripheral coverage (up and down) is decreased. Methodology: I used a ModuLite HD trailer light controller for the running, turn, stop and emergency flasher lights. I used a 12 volt relay for the BRAKE-ONLY light. By using the controller and relay, all energy used to drive the lights is drawn straight from the battery and not the existing factory light harnesses. I did not want to put extra strain on the existing harnesses. Both the light controller and relay are powered by a single fused wire coming from the battery, thus they can all be enabled and disabled by simply removing/adding 1 fuse. The trailer light controller taps into the wiring harness coming out of the "TURN SIGNAL CANCELER" located under the ignition switch (pins 2, 8 and 15 - see Vision wiring diagram). The trailer light controller only adds a couple of Milli-amps draw to the existing Stop/Left/Right wires on the bike versus full amps for attaching bulbs directory to the factory harness. Thinking Ahead: By using the ModuleLite HD trailer light controller and extra relay, I can add additional pig tail harnesses to power a motorcycle trailer if I ever decide to add one. Flat 5 harnesses: The output of the MuduleLite HD trailer controller provides 4 output wires (Left, Right, Running and Ground). In order to have a "BRAKE-ONLY" light, I added the extra relay. Now I have 5 wires coming out to make (Left, Right, Running, Ground and Brake-Only). I then run the 5-wire harnesses to each location and only use the wires necessary, leaving the extra ones there in case of future use. I have one running to the front of the bike for the mirror turn/stop signals, 1 running to the license plate, and one running to the trunk. I can add another one running to the trailer hitch should one be installed. License Plate Lights: I used 2 of the Night Rider Non-Sequental/Non-Flashing LED bars. I added 1 each to the sides of the Victory License plate using 3-M Automotive Adhesive. I had to move the license plate upwards. To do this, I removed the stock Victory mounting plate, removed the red reflector and ground off the top and bottom of the factory mounting plate just enough so no metal is showing around the license plate. The factory mounting plate now completely fits inside chrome plate frame. I then had to drill 2 new through-holes in the mounting plate for the lower to license plate screws. I used a female flat-5 connector to make a wiring harness so the plate could be easily removed from the back of the bike if necessary. The flat 5 connect sits behind the license plate and can be used to wire these lights as running lights as well. I am using them as Turn/Brake only. I also slightly bent the modified mounting plate so that the license plate lays down a tad. This does 2 things; it hides the harness behind the plate better and it aims the output of the LEDs more towards the car/truck driver behind you versus their bumper. LEDs then to be directional, so I tried to aim for the most visibility. When I shrunk wrapped the 5 wires, I shrunk wrapped the wires in a parallel flat configuration to make a flat-tape-like harness. This flat-tap-like harness allows it to be slipped between the M body panel and the trunk shroud without cutting the ABS plastic. Dissasembly: The fairing access panel, mirrors, console panel, seat and trunk had to be removed to run the wiring harnesses. The trunk only had to come off to run the license plate harness. The trailer controller was mounted under the left side of the seat in the open slot going down the inside of the bike near the back of the shock's Schroeder valve. Mirrors: The 4" Singerz are a tight fit and may limit adjust ability of the rear view mirrors. I attached the 4" Stingers to the mirror itself and used small enough connectors such that they could be fed back through the fairing holes when the mirrors need to be removed. For now, the outside of the mirrors are not sitting on top of the slot, and not in the slot. The bolt and button head allen screw hold the mirrors in place. The rubber housing on the Stingerz are firmly against the back of the fairing mirror shell, thus acting as a stabilizer and vibration dampener. The mirrors do not vibrate. I would like to find a way to add the outer most tab into the mirror mounting. The top of the LED's are aligned with the front edge of the mirror such that it shields most of the light from the driver for night driving, but still projects the light back to side, blind spot and rear drivers. Since the mirrors are at the same height as the rear trunk running lights and are further outwards, any cars/trucks can see the mirror lights from behind the bike. It also makes the bike look wider from the back by extending distance between the left and right brake lights. I think this is a BIG PLUS in visibility. Tools Lists: Phillips screw driver, metric Allen wrenches, heat gun (shrink wrap), soldering iron, ratchet, sockets and extensions, wire cutters, strippers, crimpers, grinder, tin snips. Parts lists: Cheese Wedge Running Lights: 30 LED Stringerz (12 inches) - http://www.customdynamics.com/stingerz_led_accent_lights.htm Mirror Turn Signals: 9 LED Stingerz (4 inches) - http://www.customdynamics.com/stingerz_led_accent_lights.htm License Plate LEDs: Knight Rider Non-Sequential LED Bar - http://www.customdynamics.com/knight_rider_led_light_bar.htm Trunk Brake Light: Radiantz 1' 100 LED Bar - http://www.radiantz.com/cart/index.html?c34.html&1 Trailer Light Controller: DrawTite ModuLite HD - http://www.drawtite.com/118190.html Trailer Light Wiring Kit: DrawTitle Wiring Kit - http://store.drawtite.com/118151.html Trailer Light Wiring Harnesses: 5-Flat WesBar connectors Stop Only Light Controller: 12 volt relay Misc: Wiring harnesses, solder, various diameter shrink wrap, zip ties, connectors, water proof fuse holder, 3-M automotive adhesive tape, alcohol to clean surfaces (not to drink =)Running Marker Lights:
Edited by TimS 2008-08-01 1:51 PM | ||
| |||
| TimS |
| ||
Iron Butt Posts: 810 | I did it in stages. If you wire up the controller first, then you can add the extras on a piece at a time. If I had all of the parts, it would probably take me a day to install and fabricate everything (harnesses and license plate mount), maybe less. If the harnesses were pre-made, it would take a lot less time not having to do the soldering and shrink wrapping. Tim | ||
| |||
| TimS |
| ||
Iron Butt Posts: 810 | Hi Jim, If you have taken apart a flashlight and played with batteries and the bulb when you were a kid, the bike lights are not much different. It will just take time, some $$$ and patience. I am not yet finished with the trunk lights, I am still kicking around some ideas. At least the 1 foot brake light will give some extra protection in the interim. Sincerely, Tim | ||
| |||
| Breaker |
| ||
Iron Butt Posts: 732 Western WA | Outstanding! Thank you for posting this Tim. | ||
| |||
| wrr1home |
| ||
Cruiser Posts: 196 | Tim, These are sweet, Great job!. I had some help from my local wrench and he got some relay from Kuyarken ( I type better than I spell) and hooked it up so my trunk lights will flash 3 time before going solid for brake lights and they are also functional as signal lights now. So now the trunk running lights are brake lights and signals! I want to add the ones you have in your mirrors for signals also. | ||
| |||
| TimS |
| ||
Iron Butt Posts: 810 | Are your trunk lights dual intensity (low for running and high for signal and brake)? Thanks, Tim | ||
| |||
| TimS |
| ||
Iron Butt Posts: 810 | According to my Fluke 337 meter, the whole new system (trailer controller, relay, 4 Turn/Brake LED lights and 1 LED Brake light) turned on a the same time draws 0.2 (1/5th) amps. This should leave plenty of margin for a trailer lighting system. This should not put much of a strain on the charging system at all. If conventional bulbs were used, I am sure that number would be higher. Tim Edited by TimS 2008-08-01 5:32 PM | ||
| |||
| cw1115 |
| ||
Visionary Posts: 1290 Ruskin, Fl | Nice job! I'm planning to converting the running lights in the trunk to stop and turn signals. All I need is some extra time. | ||
| |||
| Indiana RoadRunner |
| ||
Tourer Posts: 332 Dale, Indiana | Dear TimS, I like you. You're a nice guy. You drive a really cool bike. You paid lots of money for cool bike. Please buy new camera!  | ||
| |||
| Rebel |
| ||
Iron Butt Posts: 600 Linwood, MI | Indiana RoadRunner - 2008-08-01 11:41 PM Dear TimS, I like you. You're a nice guy. You drive a really cool bike. You paid lots of money for cool bike. Please buy new camera! This had me laughing so hard I was in tears! Two thumbs up for IRR!  | ||
| |||
| metalguy |
| ||
Tourer Posts: 550 Tacoma, WA | Way cool!! I like what you have done, TimS! I knew it would be just a matter of time before someone did this. And you did it right.----Metalguy | ||
| |||
| DesertJim |
| ||
Tourer Posts: 496 Scottsdale AZ | Tim - Thanks a lot!! for the instruction and link post - Its on my list to get started - Keep us posted on new findings etc. Jim | ||
| |||
| TimS |
| ||
Iron Butt Posts: 810 | IRR, Hope this is better. This is a mock up of the side lights. Same camera, better picture (I hope). Tim
(MockUp (Large).jpg) Attachments ----------------  MockUp (Large).jpg (46KB - 10 downloads) MockUp (Large).jpg (46KB - 10 downloads) | ||
| |||
| varyder |
| ||
Visionary Posts: 8144 New Bohemia, VA | Great pics and inspiration there TimS. I'm going to go the same route, starting with the mirrors. Now, to highjack the thread, my stock right rear trunk light is out. I'm trying to figure out how to get to the bulb. I thought the black trim just popped off and the light came with it. I know I did this when I did the trunk rack but don't know where the instructions are and the comprehensive owners manual that came with the bike makes no mention of it whatsoever. Before I disassemble the whole bike, does anyone know how to get to the bulb and will tell me? Thanks in advance. | ||
| |||
| 1atom12 |
| ||
Tourer Posts: 311 Atlanta Area | Just a suggestion for anyone wanting to save a bit of cash on the flexible led strips. I have used Oznium recently and found the quality of the led strips to be the same as Custom Dynamics at less than half the price... http://www.oznium.com/led-flex-strips | ||
| |||
| TimS |
| ||
Iron Butt Posts: 810 | 1atom12 - 2008-08-04 6:08 AM Just a suggestion for anyone wanting to save a bit of cash on the flexible led strips. I have used Oznium recently and found the quality of the led strips to be the same as Custom Dynamics at less than half the price... http://www.oznium.com/led-flex-strips FWIW, I tried a cheaper brand only to find the wires had inferior insulation on them. They had light weight speaker zip-strip wires with the clear insulation and were easily nicked. Being such, I tried the CustomDynamics version with beefier hookup wires. I suppose you could shrink wrap the cheaper version to add more insulation. Sincerely, Tim
| ||
| |||
| TimS |
| ||
Iron Butt Posts: 810 | varyder - 2008-08-04 4:46 AM Now, to highjack the thread, my stock right rear trunk light is out. Open up the trunk lid. There are 2 black Allen screws per red trunk light housing located on the back of each red trunk light housing (inside of the trunk). Remove the 2 screws and then pull the red light housing just out enough to disconnect the wiring harness from the back of the bulb holder. Once the harness has been disconnected, twist the bulb holder to remove the bulb holder and bulb from the red light housing. Reverse the process to re-install. Do not over tighten the screws to avoid stripping the plastic threads on the housing. HTH, Tim | ||
| |||
| varyder |
| ||
Visionary Posts: 8144 New Bohemia, VA | TimS - 2008-08-04 10:40 AM varyder - 2008-08-04 4:46 AM Now, to highjack the thread, my stock right rear trunk light is out. Open up the trunk lid. There are 2 black Allen screws per red trunk light housing located on the back of each red trunk light housing (inside of the trunk). Remove the 2 screws and then pull the red light housing just out enough to disconnect the wiring harness from the back of the bulb holder. Once the harness has been disconnected, twist the bulb holder to remove the bulb holder and bulb from the red light housing. Reverse the process to re-install. Do not over tighten the screws to avoid stripping the plastic threads on the housing. HTH, Tim Duh! Thanks a million Tim, you're da man. That's why you have coooool lights all over yur bike and I'm stumblin' to figure out how to change a bub! Rock on, dude! (headshot.jpg) Attachments ---------------- headshot.jpg (3KB - 2 downloads) | ||
| |||


| Jump to page : 1 2 Now viewing page 1 [25 messages per page] |
| Search this forum Printer friendly version E-mail a link to this thread |
| Copyright © 2007-2024 Victory Riders Network™ |