

| You are currently not logged in. Logon or register to access more features. Vision-Riders.com is a FREE service provided by Victory Riders Network. | |
|
| |
 99 LED Trunk Brake Light Install 99 LED Trunk Brake Light InstallJump to page : 1 Now viewing page 1 [25 messages per page] | View previous thread :: View next thread |
| Discussion -> Vision Tech Reference | Message format |
| SongFan |
| ||
Visionary Posts: 3204 Memphis |
Difficulty rating on a scale of 1-10 (1 = checking tire pressure, 10 = doing your own KevinX cam upgrade) This is a 2. You will need: - Red, 99 LED Stingerz from CustomDynamics.com - http://customdynamics.com/stingerz_led_accent_lights.htm? (If you want to check these when they arrive, you can attach a 9v battery to them and they will light right up. ?+ to red wire, - to black. You will lock yourself in a bathroom and light them off in the dark, aimed at the mirror and you will go "Oooooooooo." ?Then you will laugh at what a kid you are.) - 3M adhesive promoter - http://www.customdynamics.com/chrome_tie_wraps_zip_ties.htm#3M_Adhesive_Promoter - 2 Posi-Taps - ?http://customdynamics.com/posilock_connectors.htm? Scroll down until you see the Posi-Tap ?20-22 gauge Line Tap, pack of 4 for $3.40. ?You may want to go ahead and get two packs just in case you feel motivated to try other mods later on. ?Bookmark this page because the Posi-Locks and Posi-Twists are also very nice to have around. ?They also have a Posi-Lock fuseholder that is very cool near the bottom of the page. - Wire coat hanger, straightened out with a small hook on one end. - 3 foot length of wire or string - Rubbing or denatured alcohol for cleaning the trunk, clean rag. - Wire cutters - Clear silicone sealant - Electrical tape - Sharpie marker pen - A few small zip ties - A razor blade or very sharp knife Here we go. ?The caption for each pic will be below it. 1 - Remove the seat. ?If you don't know how, watch RadioTeacher here: ?http://www.youtube.com/watch?v=5-QPAMpVmhw? (You may want to do this mod also while you have the seat off.)
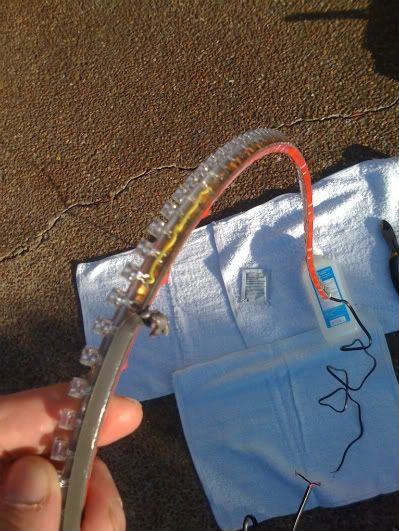
This is what the LEDs look like out of the box. ?Notice the two wires on either end. ?One is long, one is short. ?We are going to use the long one to tap into the bike and cut off the short one later.
Let's prep the LEDs. ?The Stingerz are great because they have VHB (very high bond) tape on three sides. ?We are going to use two sides only and peel the third one off. ?Open the trunk and dry fit the LEDs across the lid. ?Make sure the long wires are to the right. ?Now that you have the top and back of the lights established, we are going to peel off the bottom tape. ?Peel off the red vinyl and roll the VHB tape off. ?You can't really just start pulling on one end because it will keep breaking. ?Roll it off like a giant strip of rubber cement. ?Will take a few minutes. ?You'll be able to see how the LEDs are wired inside...Cool!
We want to find the exact center of the LEDS. ?Since there are 99, just count inwards to the 50th LED (from either end), 49 to the left, 49 to the right, the 99th is in the middle. ?Mark the 50th LED so you can easily spot it later.
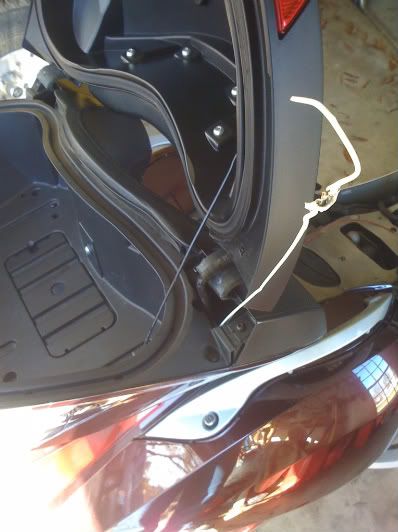
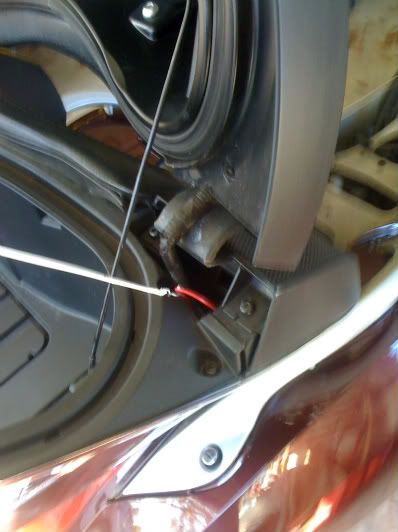
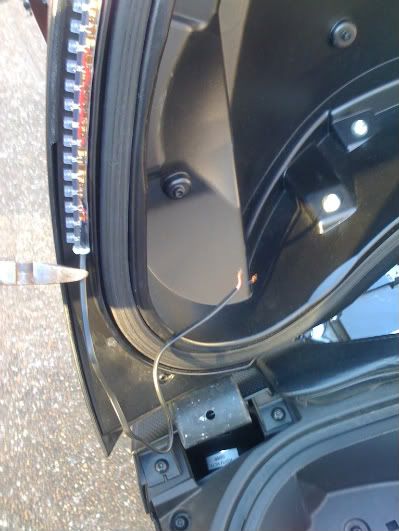
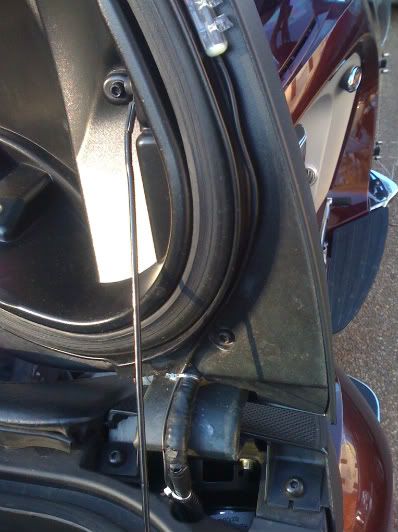
TURN OFF YOUR TRUNK LIGHT! ?It's time to go MacGyver on this project. ?Follow the wire bundle coming out of the lid, over the hinge, down into the trunk. ?You can see daylight down there so push the hook end of your coat hanger down into that space.
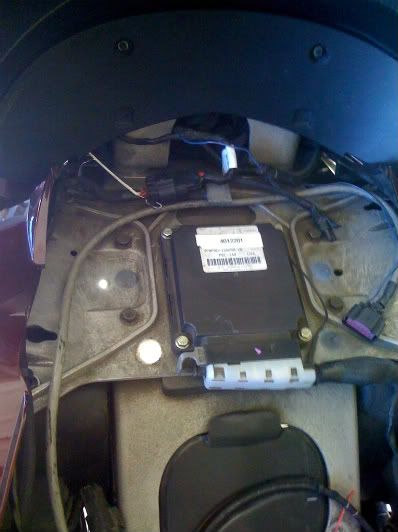
It will come out here. ?(Note to self. ?Make sure that big gray wire is behind the big flat tab or the seat will not go back on right later.)
Hook your coat hanger onto your 3' piece of wire/string and pull it back up through the trunk.
Voila! ?Do not pull the wire/string all the way through! ?Leave enough to twist to the LED wire in just a few minutes. ?We are going to use the red wire to pull the LED wire back down through that hole.
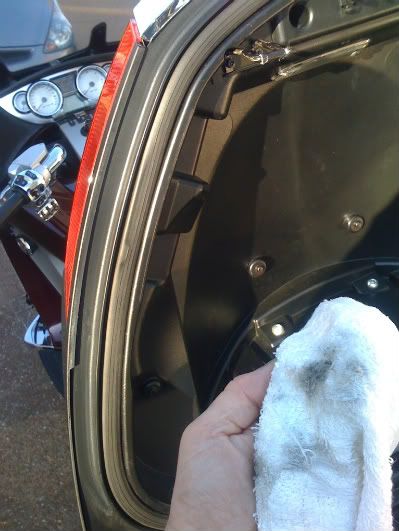
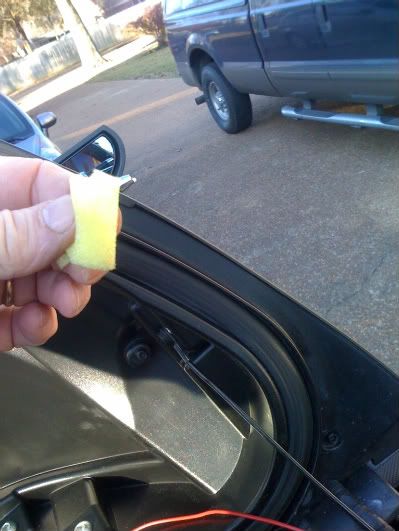
Time to clean off the trunk lid. ?I wiped it down with rubbing alcohol (because that's what I had in the house) at least five times. ?Clean all the way to where it curves. ?If you look at the bottom left of the pic you can see where I stopped cleaning. ?This is the most important step to a long lasting mod. ?(I'm sure some of you eagle eyes notice my banged up latch hooks for the trunk. ?I did the victoryvisiontour mod and the rattles are totally gone. ?The lid closes like a vault. http://www.vision-riders.com/bb/forums/thread-view.asp?tid=4231&posts=14&mid=42931&highlight=trunk+rattle&highlightmode=1&action=search#M42931) ?But I digress.
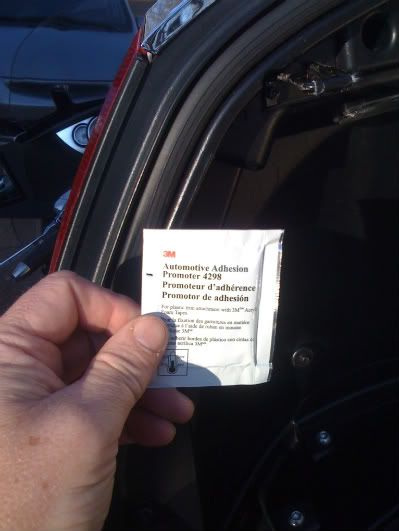
Open the promoter pack and wipe down the area you just cleaned. ?(Adding a tip here from STARSHIP 1 - You might want to use rubber gloves to keep the promoter off your hands. ?I didn't notice a problem but he said it stayed on his fingers for days after he made a similar mod to his bike.)
This is what the promoter sponge looked like after I made about 4 passes along the entire area I had cleaned. ?Not a speck on it.
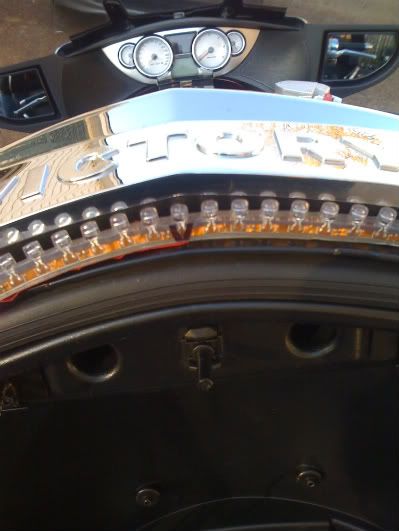
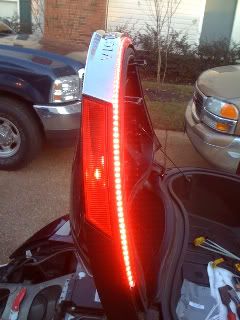
The moment of truth. ?I broke it up into two halves. ?I mounted the right half of the LEDs first and then the left. ?Aligning the LEDs on the lid: ?Do not center the 50th LED on the bottom of the "T", that is not the center! ?The point on the chrome above the "T" is the center of the lid. ?Center the 50th LED on that point. ?If you look closely, the red vinyl is still on the left side of the LED strip while the right side is mounted.
Right side done.
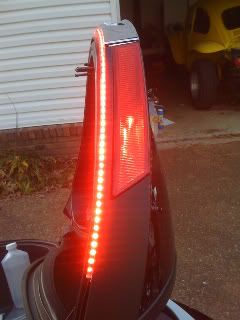
Left side done. ?Now cut off the short wire (you did end up with the short wire on this side, right?) and put a dab of silicone on the tip of that wire to seal it.
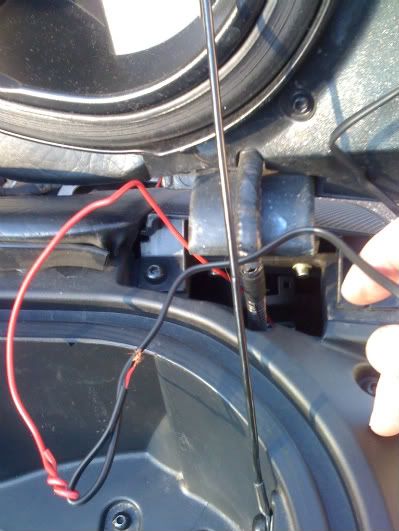
MacGuyver time again. ?Twist the black LED wire a few times to make sure it doesn't come undone on the way through the hole. ?Make sure both wires are on the back side of that cable holding the trunk lid.
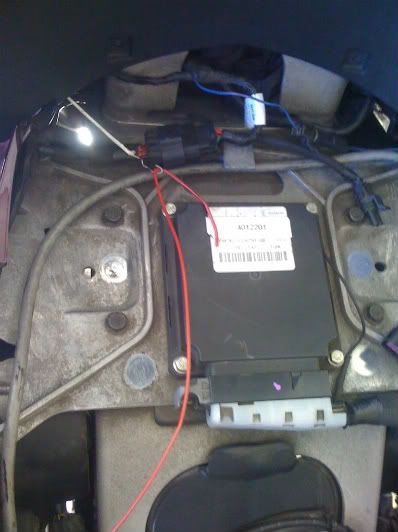
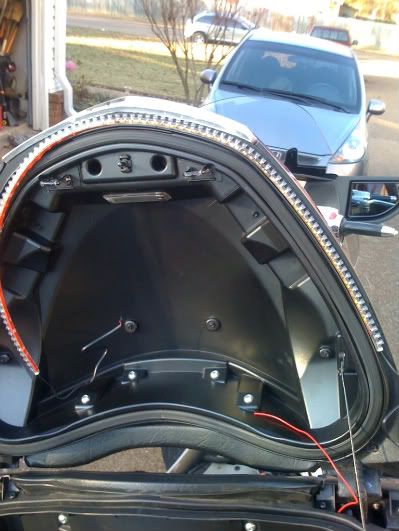
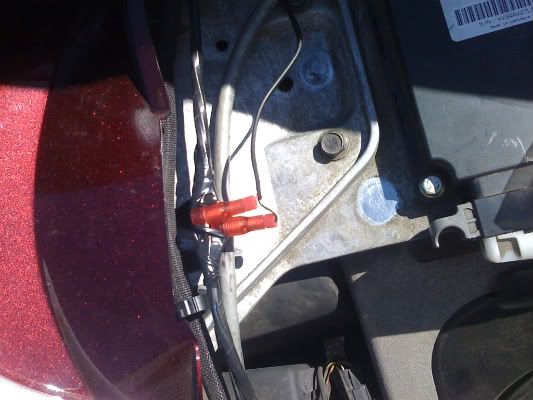
The LED wire makes its grand entrance. ?See that wire bundle peeking out from under the body panel to the left? ?(Not the one going to the plug. ?The one on top of it, covered in smooth electrical tape.) ?That's where the wires are that we'll be tapping into.
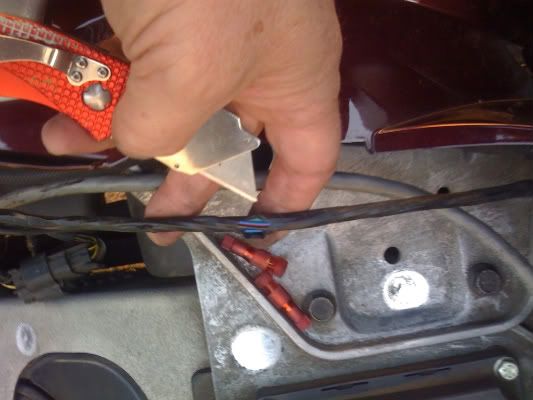
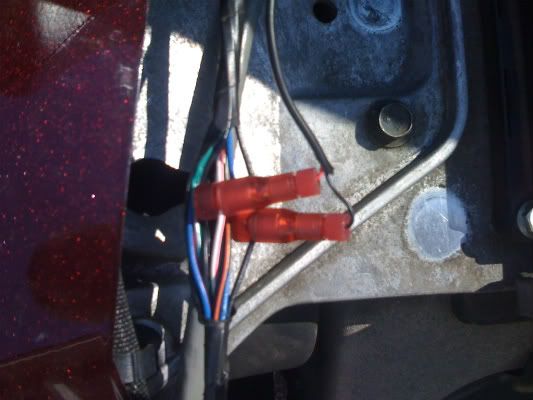
Here's a close-up of the wire bundle.
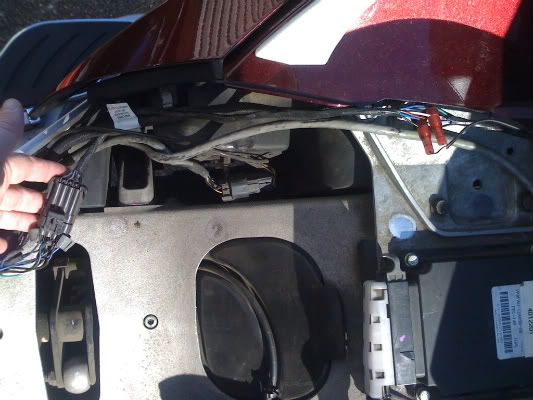
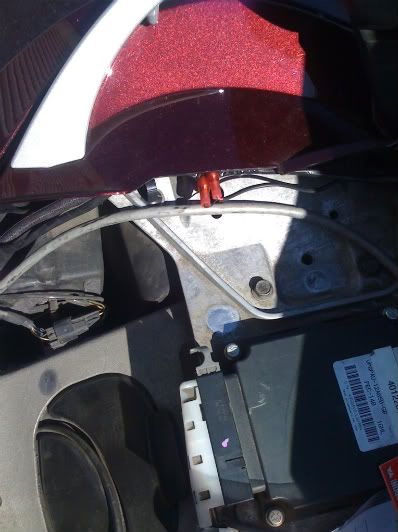
This gives you a better idea of where the wire bundle came from. ?The plug to the left is labled ABCD/EFGH. ?(If you look closely to the left of the plug, you can see where I did the RadioTeacher/KansasGuardsman mod.) ?As the wires come out to the rear, the main bundle splits into two bundles. ?At about 4-6", one bundle splits off down into the frame while our bundle continues along the top. ?It's probably tucked in under the plastic bodywork. ?After you split about 2-3" of the electrical tape, you are looking for the white/pink wire and a black wire. ?There are three black wires to pick from, choose any one.
The red wire from the LEDs is going to tap into the white/pink wire. ?Black taps into black. ?The taps are super easy. ?Unscrew the fat end and place it around the wire to be tapped. ?Screw the body of the tap back into the cap. ?(If you look inside the body you will see a gold, needle sharp point that will tap into the wire.) ?Unscrew the small cap from the body of the tap and thread your LED wire through the cap. ?Push the wire into the body and screw on the cap. ?(If you look in this end of the body you can see the other end of the metal that the LED wire will wrap around.) ?Be sure to tap the wires in this order. ?If you put the LED wires into the taps first, they will twist and break when you go to screw the main body into the wire to be tapped. ? OK. ?Stand up straight, take a deep breath and go turn the key on. ?You now have butterflies in your stomach. ?For some of you, this is the first time you have ever done an electrical mod. ?You are praying that you didn't screw something up on your $25,000 pride and joy. ?Now, lean back so you can see the LEDs and squeeze the brake lever. ?Aaaaahhhh, SUCCESS! ?It's unbelievable! You've never seen so many red lights in one place in your life! ?The only problem is you can't see them all because you are stuck holding the brake handle. ?Remember that 3' piece of wire/string you used earlier? ?Wrap it around the brake handle and pull it tight against the grip. ?Tie it off so the light stays on. ?Walk back to the trunk and spend the next five minutes admiring your handywork. ?Close the trunk lid to see how much room there is between the lights and the trunk body. ?Go get the wife, take pictures. ?Stand back about 20 feet and squat down like you are in a car behind the bike. ?You now have the most awesome brake light in the entire motorycle world! ?This is going to make every Goldwinger you see totally jealous.
Ok, two more little details to finish up and we are done.
Wrap up the wire bundle the best you can with electrical tape. ?
Tuck the bundle back up under the bodywork. ?The taps can stick out there. ?The seat won't hit them. ?You can see what I was talking about earlier about removing the trunk. ?All you have to do is unscrew the small caps from the taps, pull out the red and black LED wires and screw the caps back on. ?The LED wires stay with the trunk and when you re-install the trunk, just re-attach the wires to the taps.
Zip tie the LED wire to the wire bundle coming out of the lid, into the trunk. TH-TH-TH-That's all folks! ?The beauty of this mod is you didn't have to take the bike apart to do it. ?Your bike will look totally stock. ?If you pull a trailer, this should be a must. It should blend right in with a Kuryakyn 4710 mod or brake light modulator.
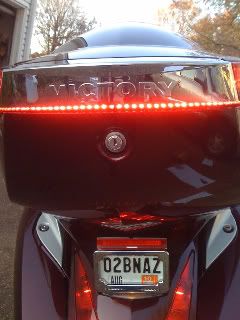
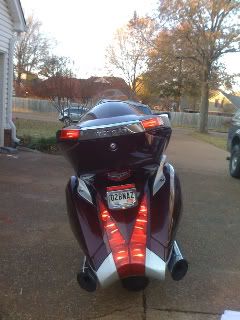
Now you see it.................................................................................................Now you don't. Let me know if you run into any problems or have a better way to do this. ?If you have everything laid out ahead of time, this will take about 30-45 minutes max. ?I hope you guys enjoy it as much as I do! Here's a YouTube of the MOABL (Mother of all Brake Lights) in action: http://www.youtube.com/watch?v=0r93fHlDaGg | ||
| |||

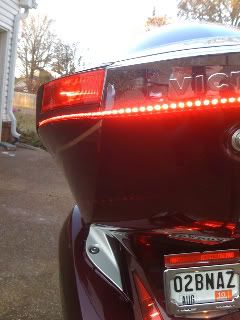 ? AKA - The MOABL (Mother Of All Brake Lights)
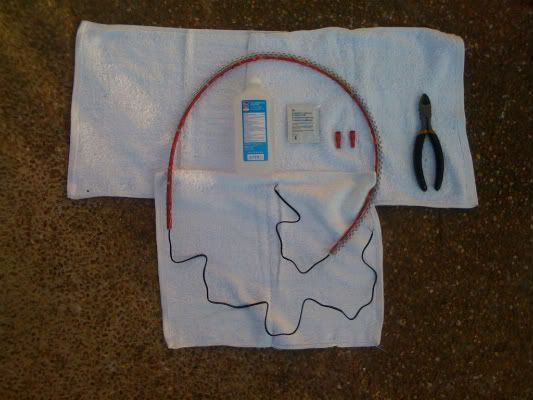


 ??
??  ?
? 
 ?????????????????????????????????????????????????????????


| Jump to page : 1 Now viewing page 1 [25 messages per page] |
| Search this forum Printer friendly version E-mail a link to this thread |
| Copyright © 2007-2026 Victory Riders Network™ |