Puddle Jumper
Posts: 37
Coos Bay, Oregon | Vision Exhaust Tip, You build
I spent a couple of weeks searching for an exhaust tip with the right diameter to match the chrome shield and muffler bracket on a stock or S1L1 exhaust, plus I wanted stainless steel for rust protection. This build takes about a day and is really rewarding.
Start with a parts list:
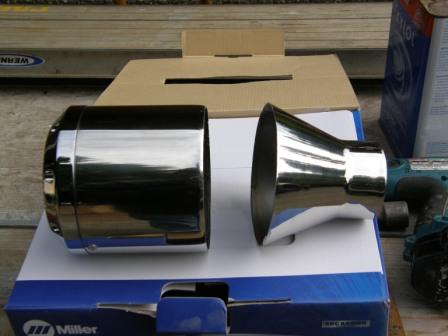
(2) Stainless Steel Tips from http://www.assuredautomotiveproducts.com
o Part #AC160 $40.00 each. These exhaust tips are listed under "Different-Themed-Style-T304-Stainless-Tips"_c61.htm
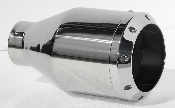
o These are stainless pipe w/ Alum Billet end.
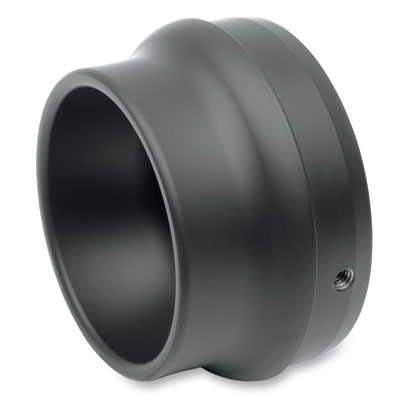
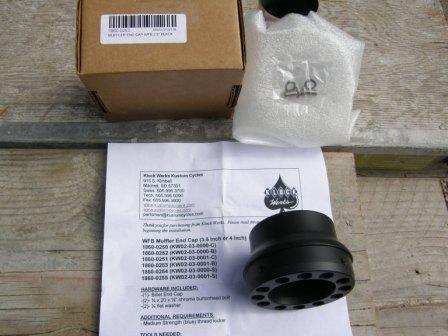
(2) Exhaust End Caps, 3-1/2" Klock Werks #1860-0253 Black, $70.95 each, go to http://klockwerkscycles.com and check out Klock Werks WFB End Caps under parts, exhaust then End caps, 3-1/2".
o PS.. I just found these for less than $60.00, www.directharleyparts.com
(6) 1/4 x 20 x 3/4" 1/8" Allen set screws
12" section of 1-7/8" I.D. exhaust pipe
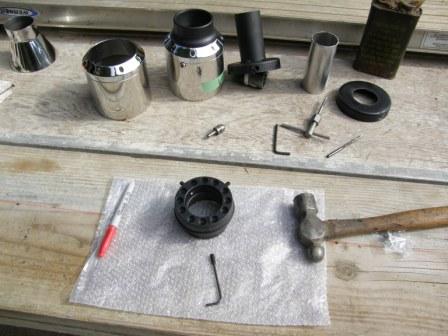
Some basic shop Tools:
2" hole saw for cutting stock exhaust tip
1/4 x 20 Tap
Drill motor or drill press
Mig Welder or friend w/ one
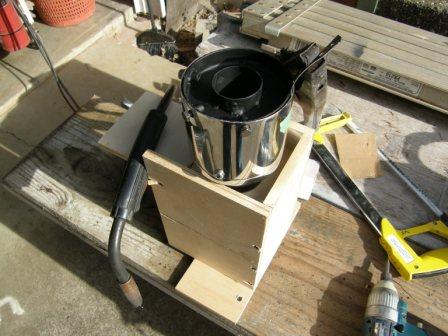
Before you get started, the toughest part of this project is going to be to protecting the SS polished surface..............I have a cloth wheel and was able to polish out a couple of scratches I made during fabrication.

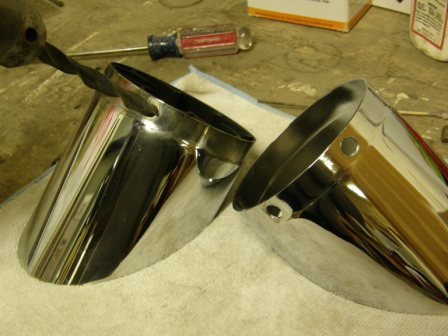
So I started by making a small wood box, a little over 4-1/2" x 4-1/2" square to hold the SS (stainless steel) tip and I made a saw cut in the box to run the hacksaw in, you want to cut these tips just where the taper starts to neck down. This box would ensure that my cut was straight and it made a secure system to hold the tip while cutting, I used a square of cardboard under the tip (to hold it up off the bottom where the SS tails will fall) and one on the side as a wedge to hold it from turning in the box. If you have never cut stainless steel, it is a very hard material, you will want a very fine toothed hack saw and go slow, take it out of the box often while cutting the tips to shake out the SS tailings from cutting, *if you do not do this, you will scratch the polished surface*. There are other ways to cut these tips to length depending on your shop setup, remember heat may discolor the tips, so consider this when you look to other easier options, like a hand grinder w/ cutoff wheel.
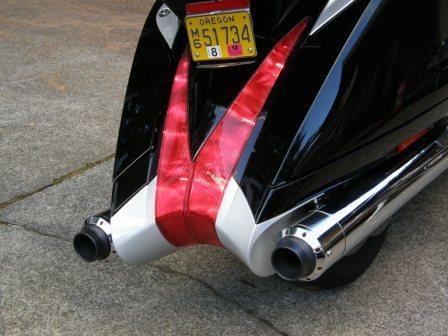
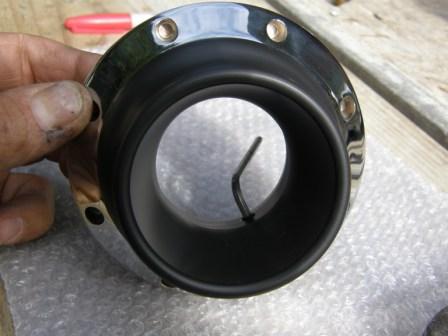
Your next step will be to remove the stock tips from the mufflers, this can be done without removing and body panels, use a 10mm end wrench. The stock tips are made of two separate pcs that are held together with crimp nuts, use a drill bit just larger than 3/8" to drill out the factory crimp, only drill the portion of the crimp nut that extend thru the chrome exterior, when this crimp is removed the crimp nuts will push thru to the inside. Save these portions of the crimp nuts that fall thru for a later step. The pictures show the one on the right with the two sections separated (crimp nuts removed).
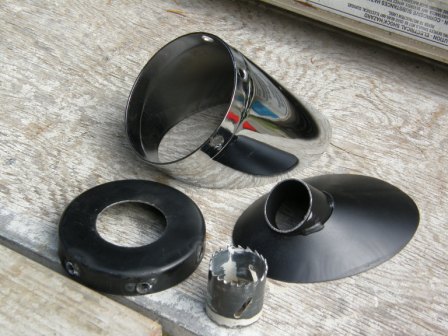
So I didn't get a picture of cutting the pipe that connected the sloped bell, the part you see on a stock tip from the cupped base (the part with the holes where you removed the crimp nuts). The next step is to take the 2" hole saw and drill out the center of the cupped base, this will remove the pipe that is welded into it. Take caution doing this, it is difficult to hold while drilling if you are doing it by hand, I attached the base to a section of 2x4 with nails thru the holes on the side so it wouldn�t turn, I used the slowest speed on my drill press and plenty of oil, go slow and you will get a perfect hole for inserting the 1-7/8" ID exhaust pipe (2" O.D.).
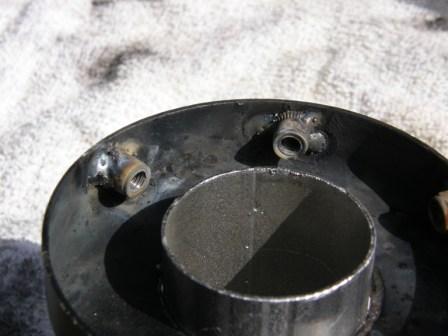
Take the (6) crimp nuts you saved and insert them into the cupped base, they should fit snug and spot weld them from the back side, clean up anything sticking thru the side of the base with a grinder.
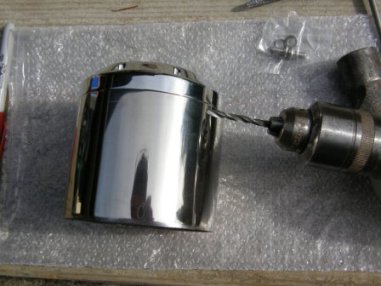
The SS tip comes with 2 rivets holding the Billet end onto the SS polished pipe, drill these rivets out one at a time, when you get one out drill the hole larger for a 1/4" x 20 thread, use the SS screws that come with your end caps (or get (4) 1/4" x 20 x 1/2" SS oval screws), once the first screw is tight then drill and tap the other rivet. Remember to take care to protect the polished finish; SS drill tailings will scratch the finish.
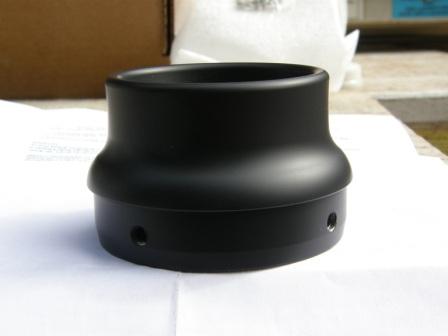
My black billet 3-1/2" end cap came with two screws; I used these to replace the rivets we talked about before.
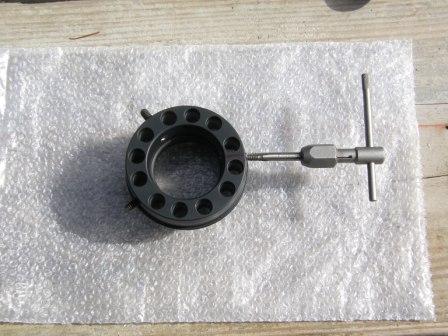
You are now going to use the Allen set screws, 1/4 x 20 x 3/4" to secure the end cap into the billet end that came with the SS exhaust tip, the black end cap comes with 1/4 x 20 thread, you will need to drill a third hole and tap threads into it. These Allen set screws will be installed pointed to the outside of the black end cap so when you tighten them they will bit against the exhaust tip and this will hold them in place.

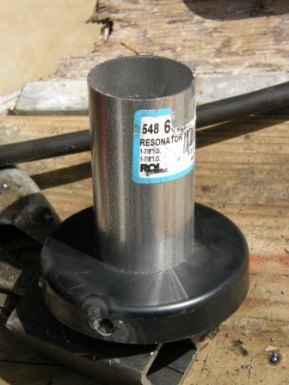
You should be here now, cut a piece of the 1-7/8 ID exhaust pipe that will space the black end cap which secured in the polished exhaust tip and the cupped base so when assembled the exhaust pipe is flush with the bottom of the base, do this with the SS pipe section engaged onto the billet end and the cupped base flush with the bottom.
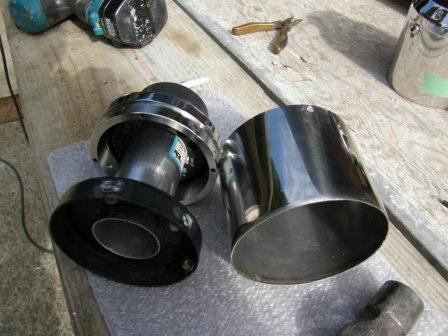
Once you get the 1-7/8" exhaust pipe cut to the right length, weld it to the cupped base and when it is cool, clean the assembly and paint flat black inside and out.
Drill three holes in the SS pipe section that match the crimped nuts you welded into the base earlier, be sure to orientate the oval head screws so they are at the same clock location, I set mine at 3am and 9 pm as looking at a clock. You will have to test fit his so you get the orientation you like.
The final assembly item is whether to weld the SS pipe section to the cupped base or just use the three bolts? I choose to weld the cupped base to the pipe section, the stainless steel welds to mild steel with no problems, if you keep your tack welds small you will not have any discoloring that will show when installed on the muffler.
Finally bolt new tips onto muffler and again you will find that the top bolt is a bitch to get in but have patients.
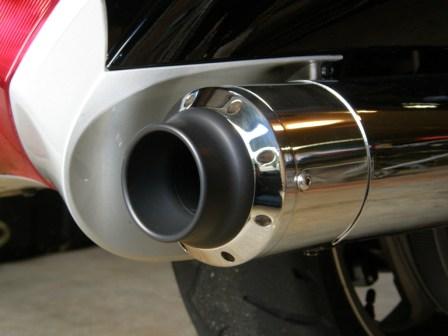
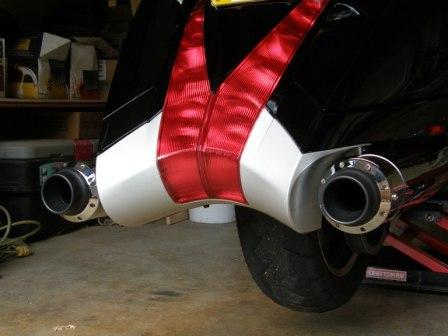
Below is a view to compare how they look next to a Gatlin Tip with 8,ooo miles on them, I got so tired of cleaning the holes in the Gatlins, my thinking with this set up is the black tips will look natural due to the soot that builds up.

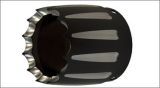
There are many options for End caps, be sure they are for 3-1/2" slip on pipes.
I liked the SE/Kerker, Yaffe After burners from Super Trapp below but didn�t like the cost, $159.00 each. They would look really cool I think.
They also have other options:
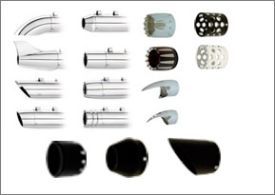
Check out most any catalog with Aftermarket HD exhaust like screaming eagle, look for 3-1/2" end caps.
Please let me know if anyone gives this a try, I would like to see pictures of your build and get some feed back as to how this instruction worked for you. If anyone has problems send me a PM and I will help you thru any questions.
Scott
|


 Vision Exhaust Tip, You Build

