Here are three rear views of the headlight assembly. Prior to removing the bulbs there are a few tips to make it easier. 1) Remove the air cleaner. 2) Lay the bike down on the tipovers for each side (if you don't have it up on a lift). 3) Cranking the adjuster knob all the way up improves access also. (Thanks VaRyder) Captions are beneath each photo. 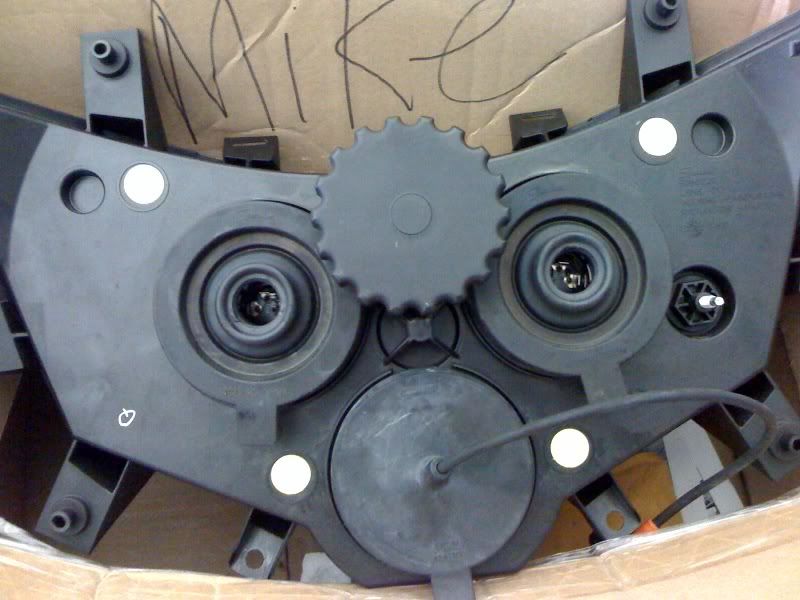
The two headlight bulbs are behind the top round rubber boots. The HID is behind the lower one. When everything is hooked up on the bike, you will have the wiring harnesses going through the two upper boots. The key to getting access to the bulbs (according to my guys) is to slide the boot up along the wiring harness as far as it will go to get it out of the way. Once the boot is out of the way, you may want to pull the plug from the back of the bulb at this point (don't pull on the wires!) and try to get the wiring and boot out of the way. The headlight adjuster knob is in the middle. The HID bulb is easy to get to but is held in place by 2 phillips head screws. You must take the headlight assembly out to replace it. Here's a link to a photo of the HID exposed. Thanks to Lotzafun! http://www.vision-riders.com/bb/photos/show-album.asp?albumid=269&photoid=2788 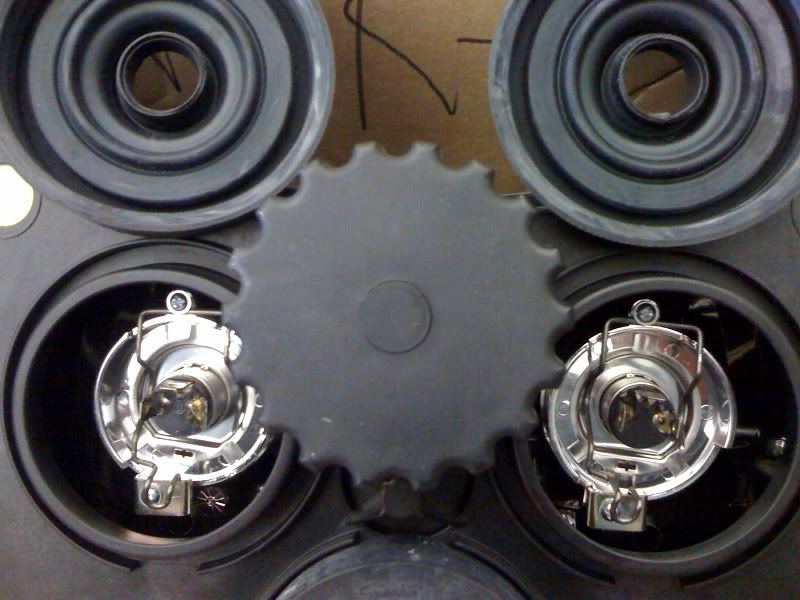 " "
This is the source of all frustration (assuming you can even reach it). The wire clips that hold the bulbs in place both unclip to the right. Feel for the bottom little curved tabs, push towards the bulbs (forward) and slide them over to the right. 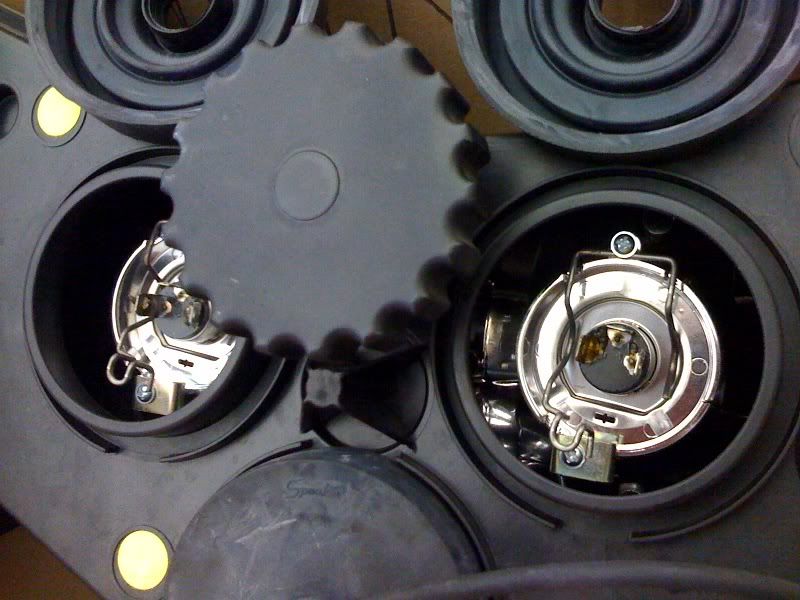
Here are both clips undone and ready to flip up, out of the way. Remember, it will be very tight in there. The boots/wires will not be that far away from the back of the bulbs. When you go to plug everything back together, notice the tab on the boots (top pic). They face down and sit in those slots at the bottom of the circle. You will have to re-seat those boots blindly so make sure everything snugs up flush all the way around the circles. When you go to re-seat the bulbs, make sure the middle male spade connector on the bulbs is up. This will help line up the tabs on the the outer part of the bulb housing. Don't touch the glass on the bulbs! I hope this helps those of you who can get up into that space. Thanks to my guys at FRS Powersports for giving me access for these pics. The Vision Tech Reference posts are not set-up for replies or feedback so if you want to comment or think I need to change something here, click on this link and reply: http://www.vision-riders.com/bb/forums/thread-view.asp?tid=7539&posts=9
Edited by SongFan 2010-11-24 8:52 PM
| 

 Headlight Bulb Replacement Photos

