You are currently not logged in. Logon or register to access more features. Vision-Riders.com is a FREE service provided by Victory Riders Network.
|
|
|
|
Visionary
Posts: 1229
Rancho Cucamonga, CA | I've read most of the threads that dealt with the Clearwater Driving Lights before buying them, so I thought I'd compile the information into one spot.
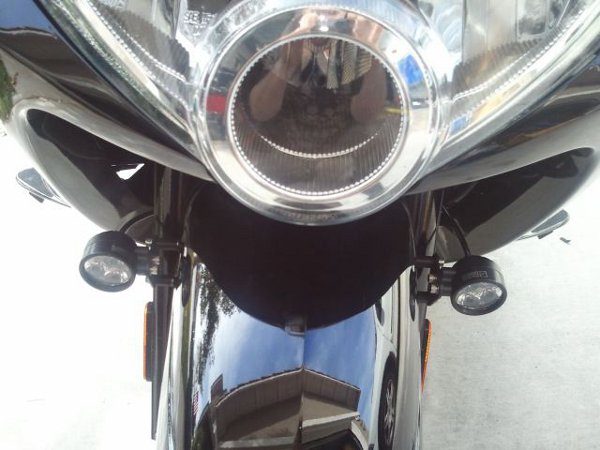
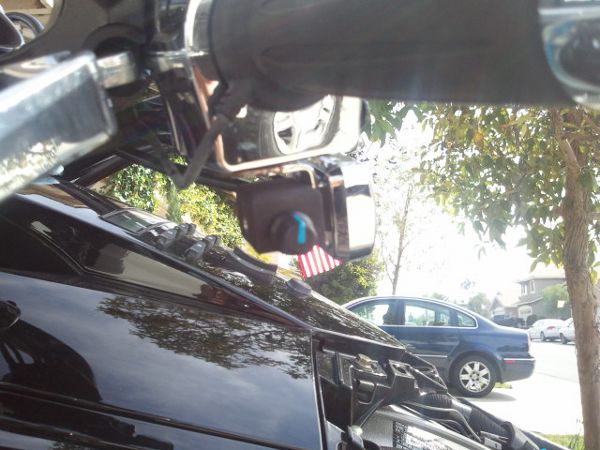
The Clearwater Driving Lights are High Powered LED lights that mounts on the sides of the front fender providing extra light and increased visibility by oncoming traffic.
They are fully dimmable, easy to mount, and draw only 1 amp each at max power allowing you to tap into the power wire from the headlight or aux. driving light without needing a power relay.
They will also automatically go full bright when you turn on your Highbeams or sound your horn.

The lights are mounted to the fender by replacing the two fender bolts in front of the forks with the mounting bracket;
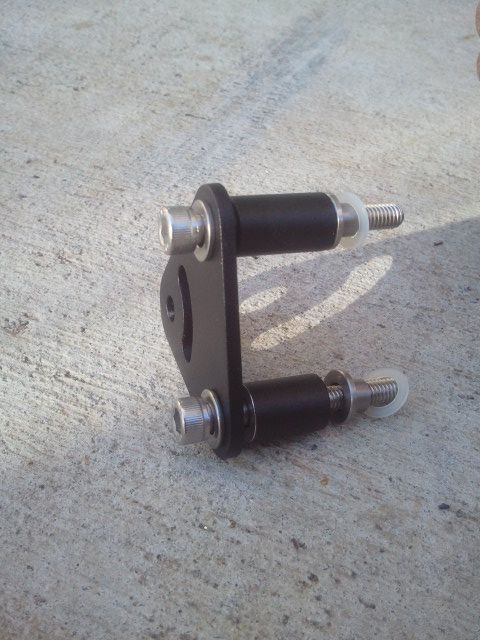
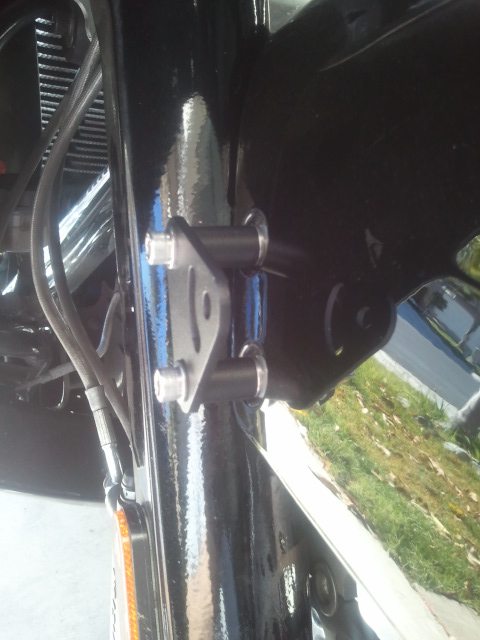
I found that the front fender was to loose with the provided setup and I needed to purchase M8 zinc coated washers (4 total) to slip onto the step washer before the nylon washer. This made everything snug.
When attaching the lights to the bracket, you will find that the allen wrench is to long. Tarpits99 buddy Milton came up with cutting an allen wrench down to fit. I also recommend protecting the fender with masking tape while tightening these bolts;
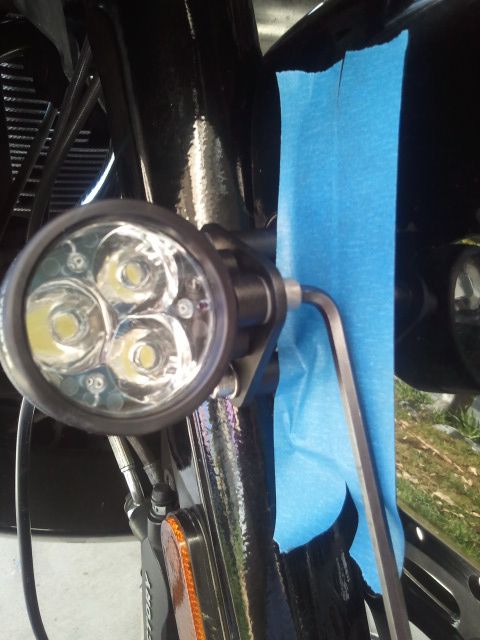
Finish by running the wires back and zip-tying to the brake cables and running them up to the dash making sure there are no restrictions when bars are turned fully in either direction. The included instructions are easy to follow for wire routing and light adjustment.
The Clearwater instruction manual recommends mounting the dimmer switch on the side of the dash, but thanks to Tarpits99 we have a better place to mount it, behind the radio controls on the left handlebar. SongFan gets the credit for thinking of moving them to the handlebars though and also figuring out that you can mount the dimmer bracket with the opening facing downward. This requires that you only need to drill a hole large enough into the bracket for the screw to fit. It is best to dismantle the dimmer from the bracket, drill the hole and mount the bracket, then reinstall the dimmer control into the bracket.
The rest of the wiring is fairly easy by following the included instructions. Download the color .pdf file http://www.clearwaterlights.com/infopg_manuals.html because the black and white one gets confusing with colored wires.

When connecting the white wire to to Highbeam wire, you may find it is either green or blue. My 2010 is green, just make sure it's the wire that goes into the harness at position #3.
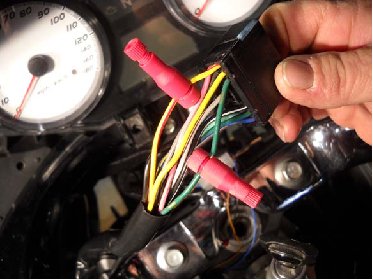
You can also have the lights go full bright when you hit your horn. The wire for the horn is the gray wire and goes into the harness at position#8
If you want to have both the Highbeam and Horn option, you will have to make a trip to Radio Shack. You will need (2) 1 amp diodes, part #276-1653. Splice these into two wires that you will use to connect from the white wire on the dimmer control - one to the Highbeam wire and the other to the Horn wire. make sure the "cathode" side (the side with the stripe) goes toward the dimmer.
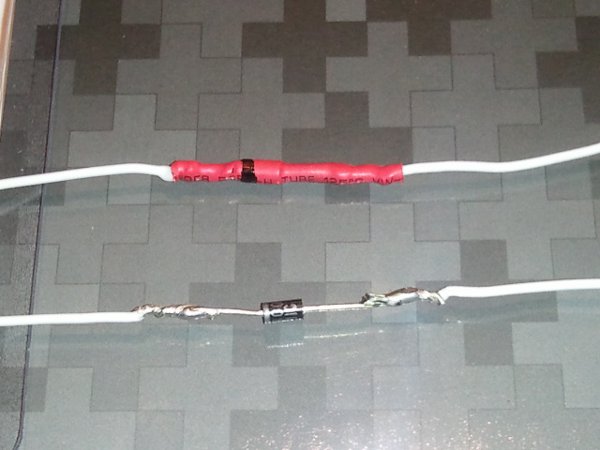
The bottom wire shows the diode before it is covered in shrink-tubing. Make sure you mark the shrink-tubing with wich side is the "cathode" side.
The new "Krista" lights that Clearwater offers has this mod done already. These lights cost more and are to big to clear the fairing when the forks are turned if they were to be mounted in the same location.
The Krista lights are 5x brighter than the Glenda's but require a power relay and some creative mounting. The Glenda's are plenty bright with the equivalent of about 50 watts halogen each.
Here are two pictures of the Glenda from head-on, one at minimum and the other at maximum power.
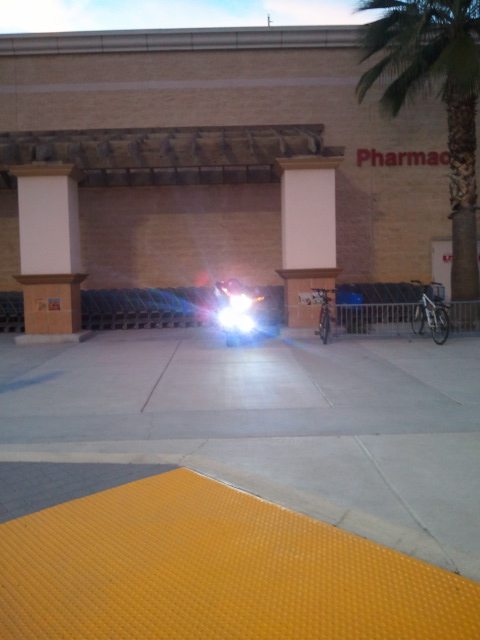
This has been one of the best accesory for safety that I have added so far.The triangle pattern the lights emmit to oncoming traffic make the bike very visible. Nighttime riding finds that the lights fill in the area below the low beams for a greater field of vision. It does seem to be a fairly narrow pattern though and I'm working on a way to widen it a little.
Edited by Nozzledog 2011-02-06 3:44 AM
|
|
| |
Jump to page : 1
Now viewing page 1 [25 messages per page] | |
|
| Copyright © 2007-2025 Victory Riders Network™
|
|


 Clearwater Driving Lights (Glenda) Install

